Classical Conversations at Home – Cycle 1 Week 1

Welcome back! Are you ready for another year of CC? We started back at our campus yesterday. I am tutoring again this year and I have a class full of 9 little girls! So fun.

Here at my house, I have a large whiteboard in our school room. I have written down this weeks memory work on the board for us to practice and review.


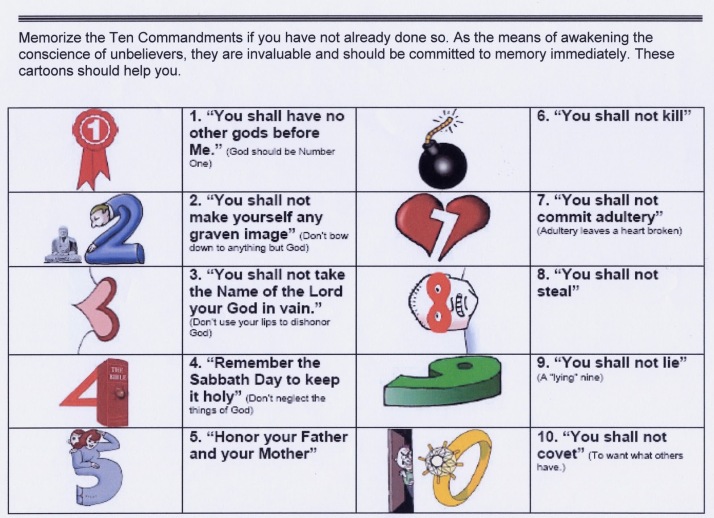
For the first 5 commandments, we are using both visual clues and hand motions.  For the visual cues, I cut the images out of the document that I found here. (http://laughlovelattas.blogspot.com/2011/02/helping-children-learn-ten.html)


Our hand motions are as follows –

1) hold up one finger shaking it as if to say “no, no, no” and then point up to God.

2) hold up index finger on each hand and then bend one in a hook as if it’s bowing down to the other.

3) hold up three finger on one hand in front of your mouth as you speak/sing the words.

4) hold up four fingers on one hand and then lay them in palm of other hand as if they are resting.

5) use the American Sign Language signs for father and mother (http://mykidentity.com/?p=462)


Our hand motions for science are –

Kingdom Phylum (motion as if you are setting a crown on your head)

called his Class to Order (cup both hands on either side of your mouth as if you are calling someone)

so the Family Genus (stand up straight and tall and interlock your fingers in front of you as if you are pious)

could learn more about Species (point to your temple as if you are thinking).


At my campus, our director blows up the current map and laminates it for all the students to use in class.  Then she sells extras at cost to the parents in the program.  I bought one for home use.

Next to it, is the Noun Cases for Latin.  I bought one of the Target Dollar spot pocket charts.  Then I created a document in Word with all the noun cases, printed, laminated and cut it apart.  Since we will be doing these noun cases for a total of 4 of the 24 weeks, it’s worth the effort to me.  This makes for an interactive activity as I can hand my child the stack and have him match them up.  Just the English side first, then just the Latin side, then hand him all and have him build the chart from memory.


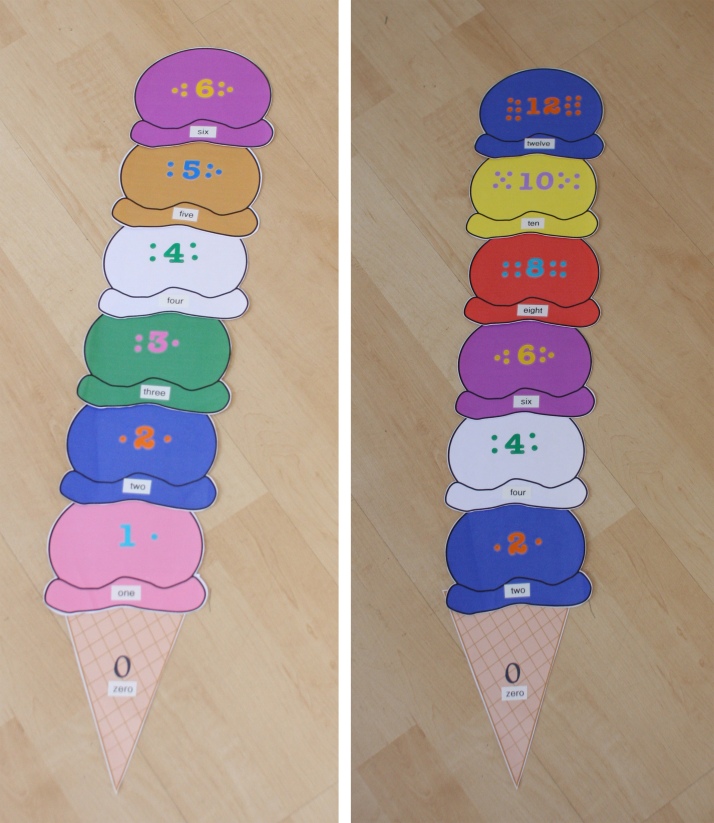
For this week in math, I have these cute little ice cream cones.  I made them when my boys were little and learning to count.  I have them 1-12, even numbers to 24 and set up for skip counting the 3’s.  My kids already know their 1’s and 2’s so we don’t really use these much at home.  However, I did use them when they were little and have used them for three years as a tutor.  If you have preschoolers or young CC students, perhaps it’s worth the time to make a set for your  home.  You can find the printable source here. (http://www.first-school.ws/activities/crafts/colors/icecreamcone2.htm)


I obviously did not include them all when I took the picture, but you get the idea.  When I made them, I used some old scrapbooking number stickers I had on hand.  I included dots so they could get a visual for how many each number represents and I labeled them with the number word.  Then I laminated and cut out.  My kiddos enjoyed stacking up their ice cream cone.    They can also be taped to a wall in your home for a temporary display.

I hope this inspires you to review and practice at home so your little ones can retain all that valuable information this week!

Cheers!
 

WIWW – Cowboy boot edition

Welcome back!  I was MIA for a week because we took a family vacation to Tennessee.  It was the best family vacation we’ve had to date!  I really, really did not want it to end.  {sigh}

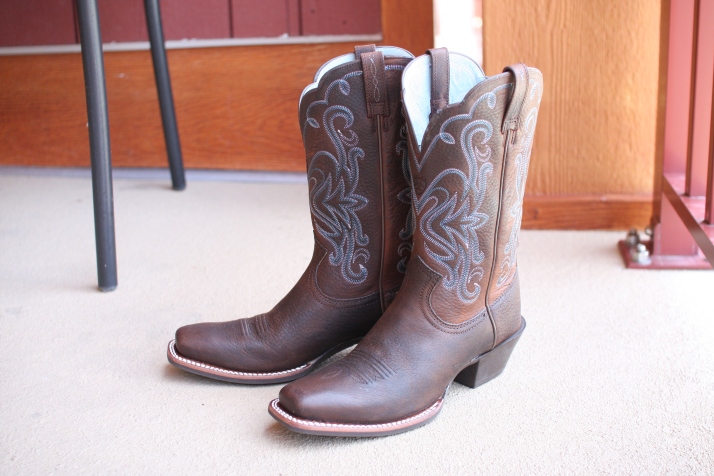
While we were there, I was keeping my eyes out for a fun souvenir from the trip.  With my new I-hate-clutter approach to life, nothing was appealing to me.  BUT!  I’ve wanted a pair of cowboy boots for ages.  Around here, you can spend $300 for a pair without blinking an eye.  So, I decided to see if I could find a pair that I liked there that was more reasonable.  And I did!

Aren’t they lovely?  And they are so comfortable.  They are 11 inch boots by Ariat.  As much as I wanted to find a pair of sassy red boots, that will have to wait for another day.  I decided to start with classic boots that I’ll likely wear for years to come.

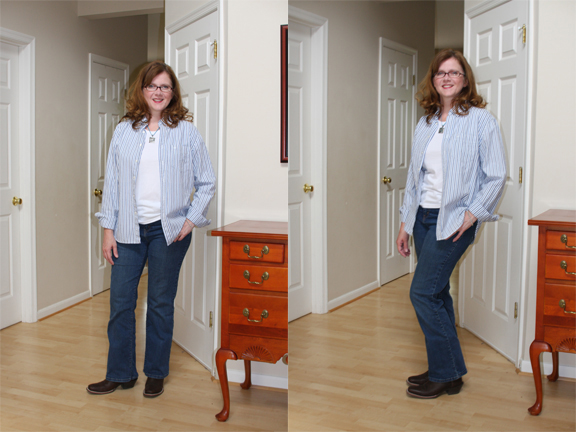
So this week’s WIWW is a classic white t-shirt, my Docker’s boyfriend shirt, Levi’s 512 jeans (the BEST jeans for a woman with hips) and my boots.  I was so pleased that I actually put on my jewelry too!  I have had the blue Lia Sophia necklace hanging in my jewelry cabinet for at least two years now.  New with tags until yesterday.

I discovered today that my daughter might not be my best photographer.  Every one of the ten pictures she took is fuzzy.  I guess that camera is pretty heavy and hard to hold perfectly still if you are only 10.  LOL.  Note to self – get out the tripod next time.

Since I’m currently on a kick to make myself a highly functional wardrobe that doesn’t require a ton of upkeep or space, I decided to sign up for a new website called Go Chic or Go Home.  I think it could be really wonderful if I could get it to work right.  I’ll keep trying but in the meantime, it at least gives me some good inspiration for what real women are wearing.  (http://gochicorgohome.com/)

Check out what other real women are wearing by clicking the link below and visiting The Pleated Poppy.

pleated poppy


Saying Goodbye

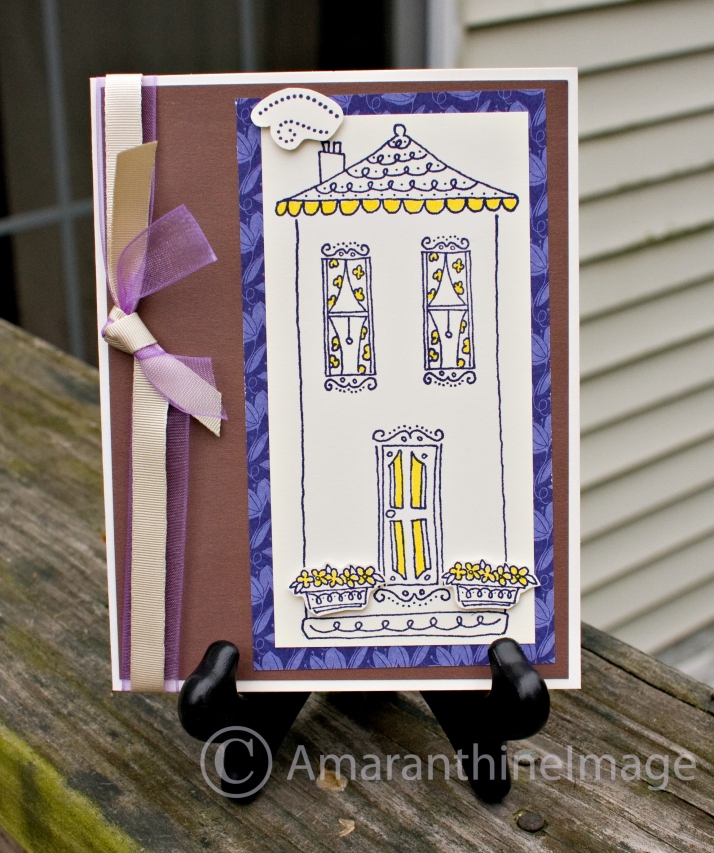
I made a card for a friend who moved away earlier this month.  A pretty simple card.  The hardest part was lining up the walls straight for the house from the Close to My Heart stamp.

I used a card base from a collection I bought a Michael’s.  The cardstock is Stampin’ Up cream.  The pattern paper is Concord Crush from a stack of Stampin Up Designer Series Paper Patterns 6×6.  The ribbon is from CTMH (the color matches better than it appears in the photo) and American Crafts.  The stamped images come from CTMH Around the Block set.  If you’re looking at buying it, only buy it if it’s cheap.  The way they designed the house stamp makes it hard to line up those walls properly.  The sentiment on the inside is CTMH Chairs to You.


It’s not my favorite card I’ve ever made.  But I think my friend will appreciate it all the same.  She is the type who appreciates the fact that someone thought of her so I feel good sending it to her along with a nice long letter.

Cheers!

A new lovely for me!

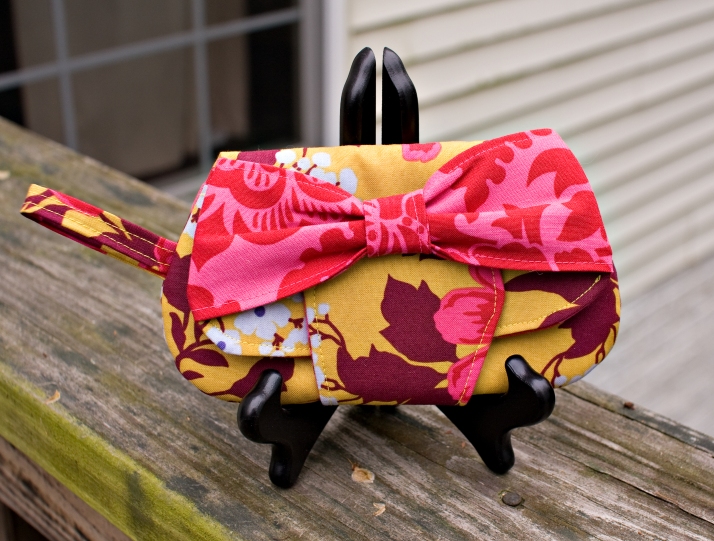
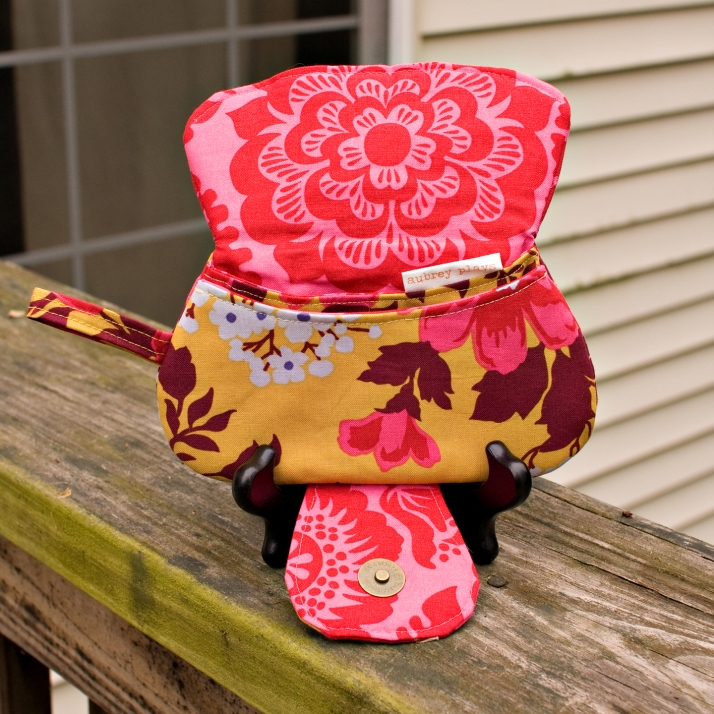
Look what I got in the mail yesterday!  It’s she a beauty?

I love her!  She is meant to hold a cell phone.  See the inside how it has two pockets?  I could throw a debit card and my phone in there and be ready to go.  I just LOVE this little beauty.  If you want one, you can order a custom one here at Aubrey Plays on etsy.  She does the BEST work.  I’ve ordered multiple things here and I’ve been pleased with everything.

Life at Grandma’s

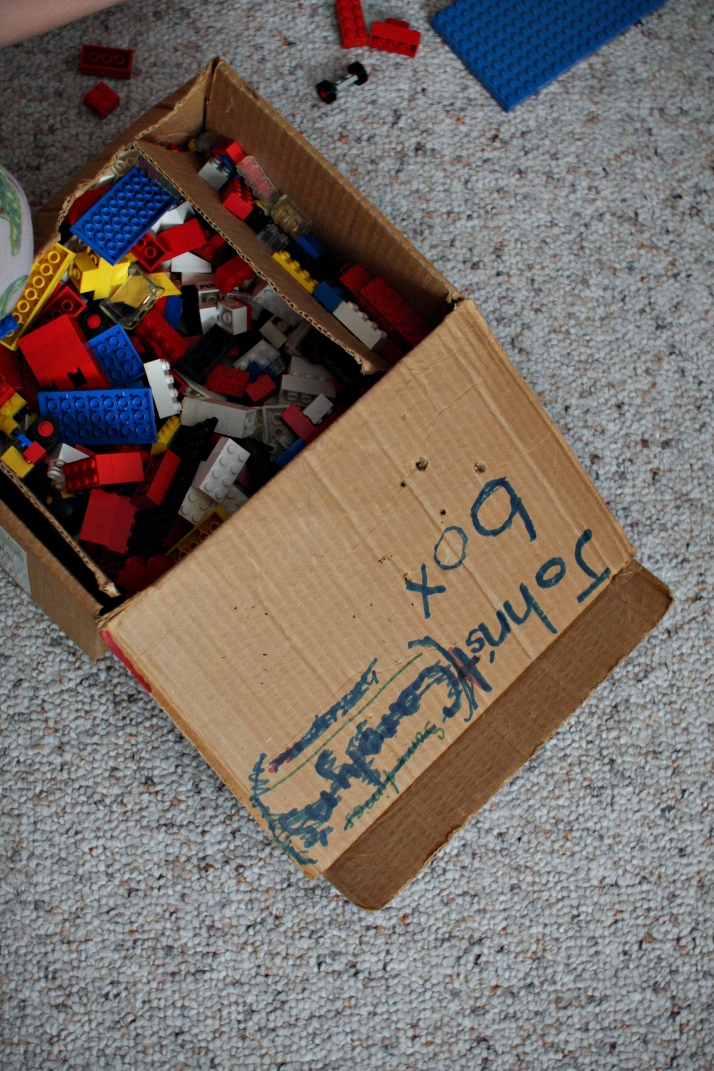
While we were visiting my in-laws this weekend, it struck me that my boys love to pull out the same toys each time they visit. I thought about how these toys are part of their history and my husband’s history as well. So, I thought they deserved a place in my family album. It likely won’t mean much of anything to them right now, but someday when they are men, it might.

This is a Lego set my husband had as a boy that he stored in a old shoe box that had once belonged to his sister.

I love how the box itself has evolved.  It must have once been hers – then theirs – then his exclusively.

Such a small detail but so precious all the same.

You can expect to see this in my Project Life album sometime.  Speaking of which, I’ve fallen terribly “behind” this year.  I don’t really believe in “behind” but you know what I mean.  Anyway, that February Funk that I get each year hit me particularly hard this year.  I recently realized that I took no pictures of my children (other than phone camera snaps) during the month of March.  You know I’m in a funk if I don’t even pick up my camera.  It was a hard season for me.  Harder than usual.  But I’m back to happy and that’s all that matters now.

Cheers!

Bookplates as a gift

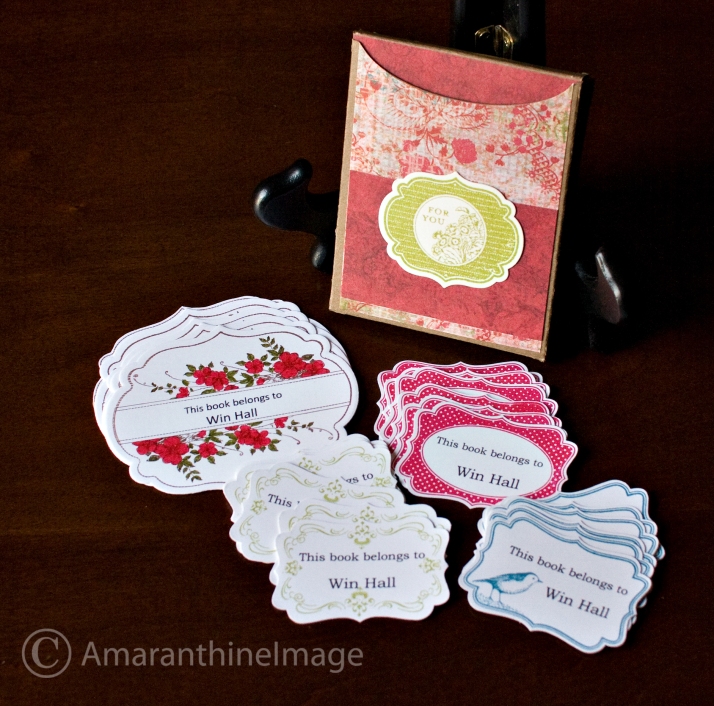
Yesterday I was watching this video from Papertrey Ink about making a gift of bookplates. It reminded me that the last time I visited my mother-in-law she mentioned that she is forever loaning out books and not getting them back.

Since we are going to see them tonight, I thought I’d whip some up for her. However, I don’t own any of the fun products used in that video. So I created my own bookplates using what I have on hand.

First I typed up my words in Word. Printed them on printer paper and made sure they fit within the stamps I own. Then I printed them on Stampin Up White Cardstock. I pulled out my old giant Xyron and added repositionable adhesive to the back of the entire sheet.

Since my Stampin Up images I was using were not clear, I used my Stamp-a-majig to get my placement right. Then I used my Framelits Labels collection to cut out the big bookplates and the “for you” on the front of the crayon box. Additionally, I used my Decorative Label punch for all of the smaller ones. The stamp sets I used were Apothecary Art and Four Frames.

Eventually, I had to figure out how to package them. So, I used the Crayon Box on my Tags,Bags, Boxes & More Cricut Cartridge at 5 inches with Real Dial size turned on. (I have no idea if that made any difference in the final size.)

I covered the front with paper from a boxed collection from K & Company. It only declares that it is “150 Classic Papers” and gives code 524446.

I hope she likes it!

The gift has 23 bookplates in it. It would have been 24 with six of each style but I messed up royally stamping one of the large Apothecary Art images.

Before and After

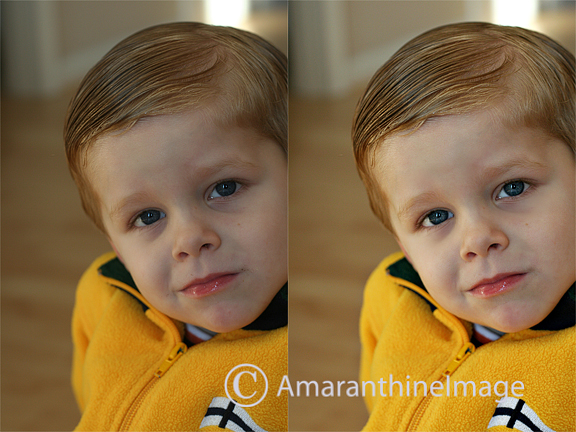
I was going through some of my older pictures and found a picture of my son from January 2008 that made my heart sigh.  Do you do that?  Find pictures of your babies that make you stop and stare at them and remember how precious they are?  This was one of those moments for me.

Anyway, I decided to pull the image into Photoshop (I’m still working in CS3) for a little edit session.  I used an action I created from watching Erin Cobb’s Clean Color (levels, curves, etc.) and then I tweaked it with my Totally Rad Actions.  I.  Love.  Totally Rad Actions.  Just so you know.  I think they are the best thing to happen to Photoshop since Photoshop.  Here is my before and after for you.

Anniversary Card

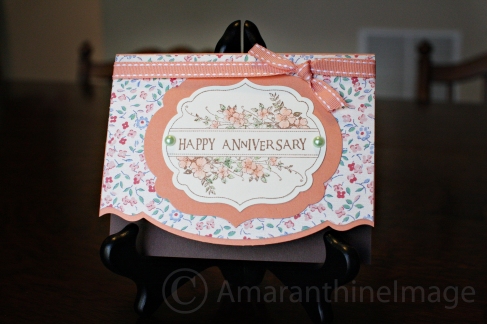
I made an anniversary card last night with some of my new Stampin Up goodies and used up some of what I’ve got.  I love use-what-you’ve-got projects.

I used Groovy Guava (discontinued), Ivory and Chocolate Chip cardstock from Stampin’ Up, some random designer paper in size 6×6 that I got in a goodie bag back when Recollections was open here in LoCo.  I wish I could tell you who made it but I have no idea.  Groovy Guava ribbon.  Framelits from Stampin’ Up are Labels Collection and Adorning Accents Edgelits.  The image is Apothecary Art from Stampin Up (I LOVE this set).  And the sentiment is from a CTMH set Say it in Style.  I pulled out my 10+ year old set of Stampin’ Up pastels and literally wiped a layer of dust off the package to color the flowers and leaves.  Image

At the last second I added those little green pearls.  I bought them at a scrapbook convention awhile back and I have no idea who makes them either.  But I love them!

Cheers!